Bring the tropics closer to your home with these DIY coconut pots and bohemian macrame plant hangers.
Last updated: March 6, 2026
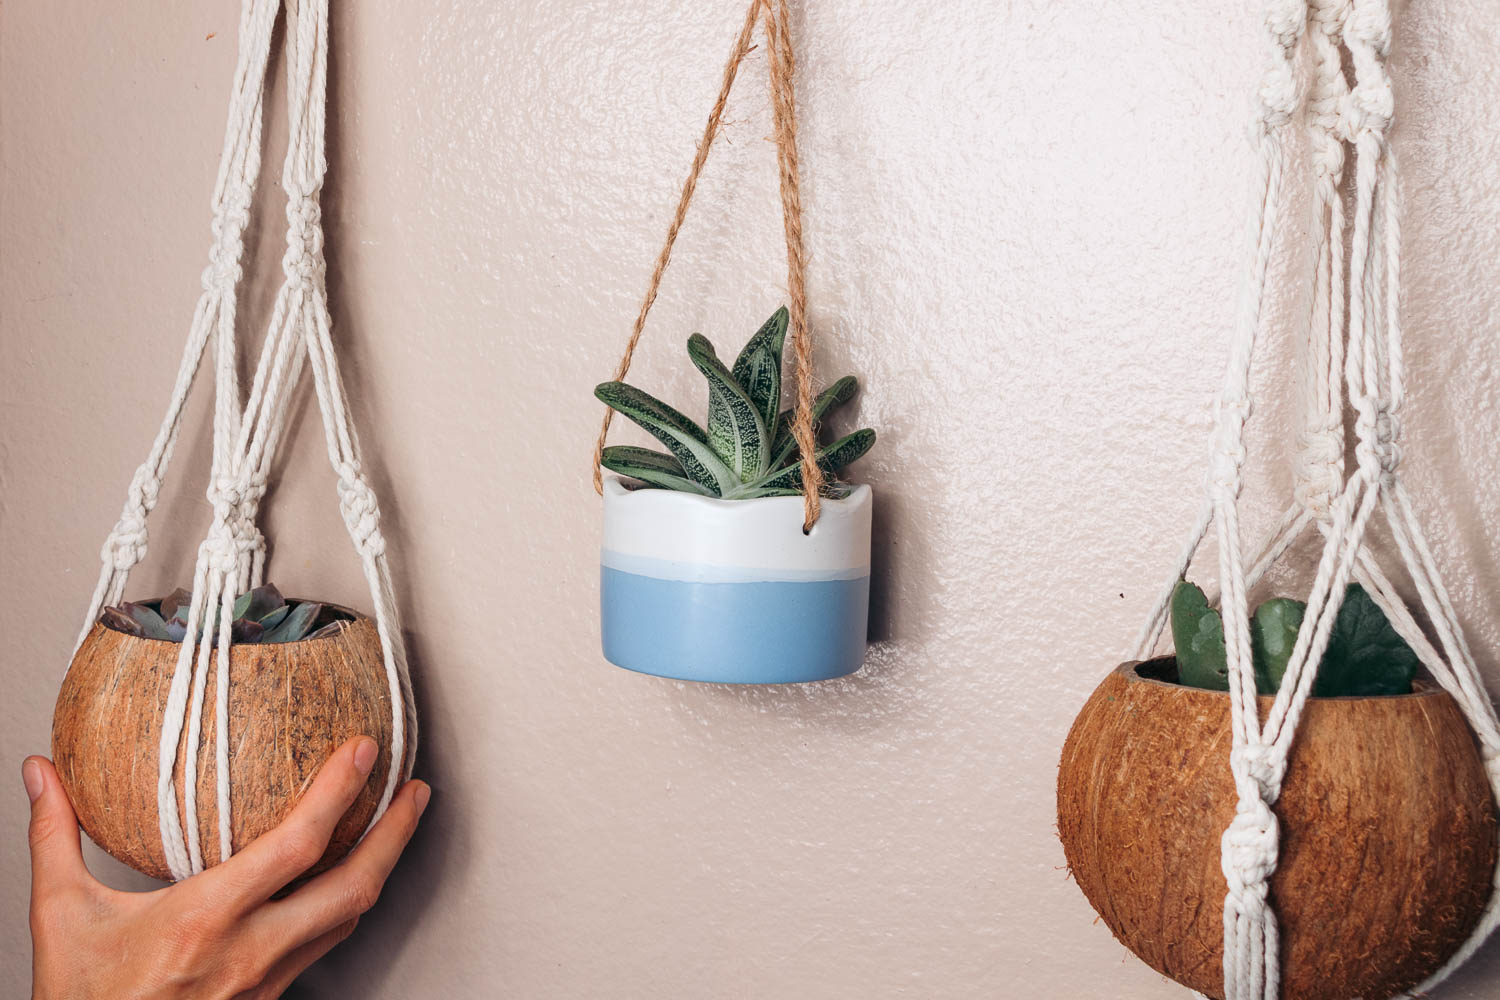
Spice up Your Home with the Tropics-Inspired Coconut Pots and Matching Macrame Plant Hangers
Coconuts are seasonal “guests” in our house. But once the refreshing coconut water gets transferred into a glass, the coconut shell normally ends up in a recycling bin, sometimes with the nutty “meat” still attached to it.
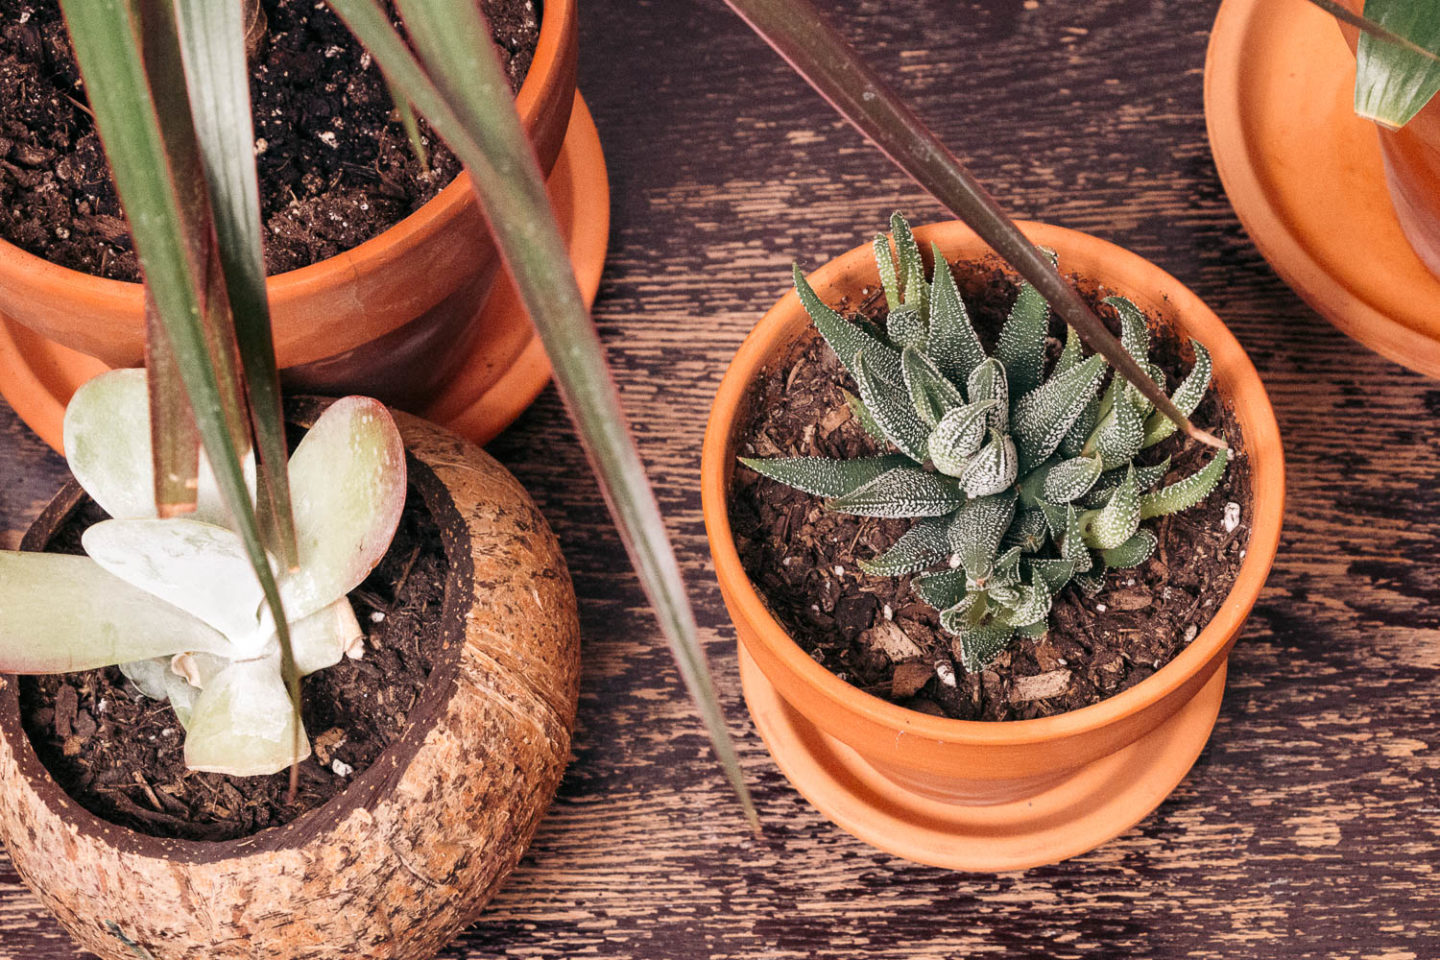
This time around, however, I decided to find a better use of the recycled coconut shells and turn them into the cutest little flower pots that instantly added a tropical vibe to our California home.
Every time I look at these improvised coconut pots, my mind goes back to Hawaii with its abundant coconut trees and roadside fruit and coconut stands. And it feels like the adventure never ends…
If you are ready to start a tropical adventure in your own house, then let’s begin this DIY project. One thing to mention before we start. The coconut pots don’t have a nice flat bottom. So you can drill a few tiny holes and insert some “legs” to support your plants.
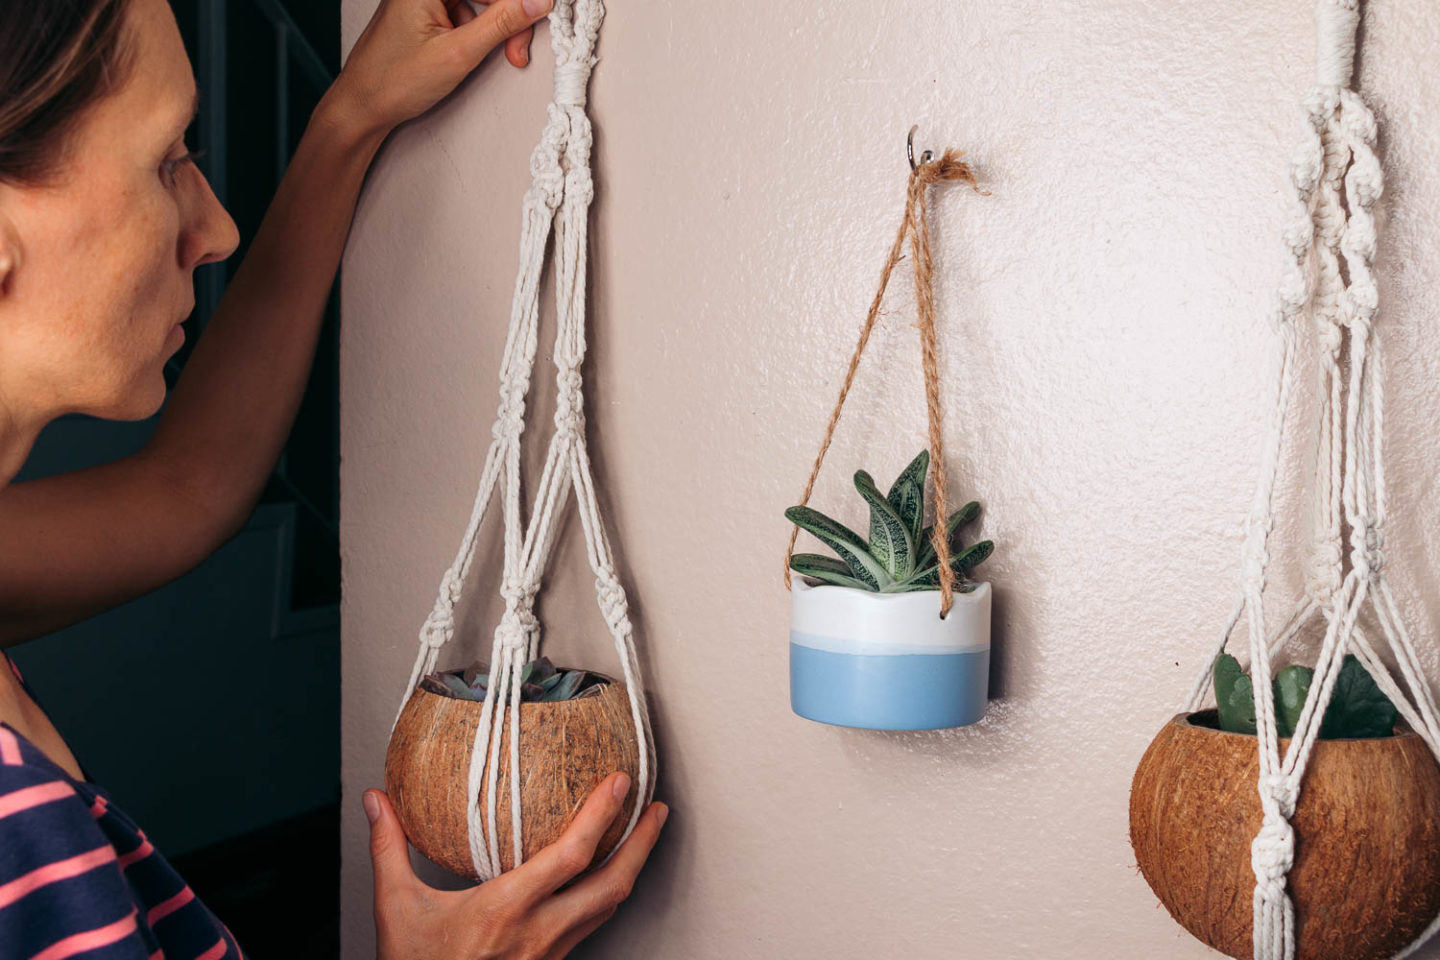
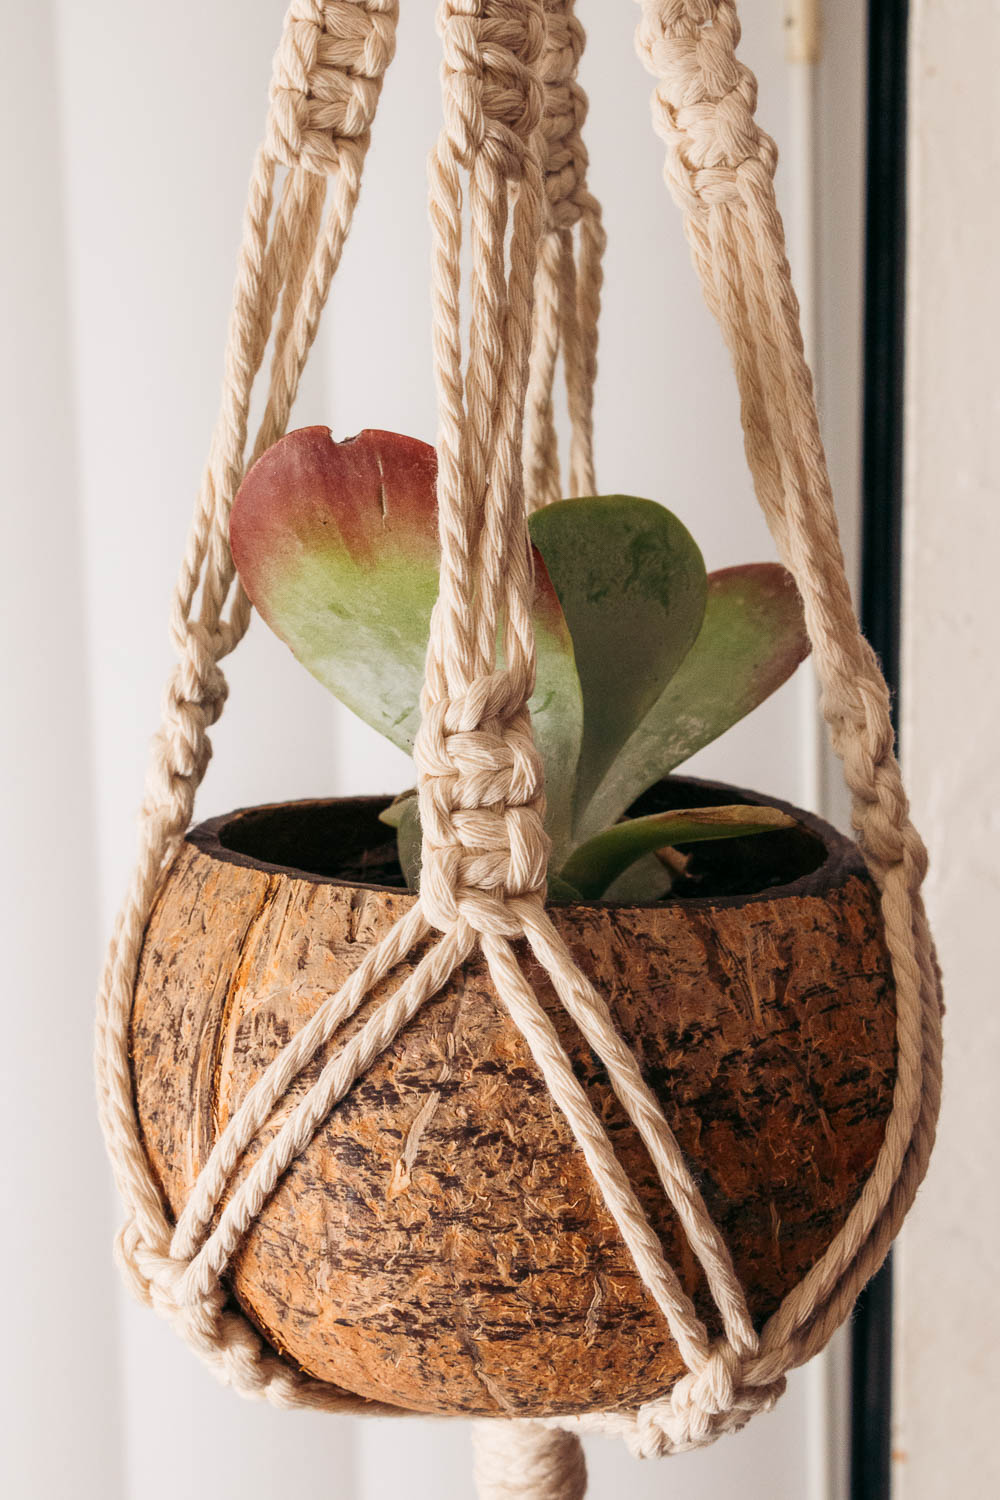
I decided on playing with two different styles, putting my tropical coconut pots in homemade macrame plant hangers whose origins can be traced back to 13th-century Arabic decor traditions. You can find the simplest method for the DIY macrame plant hangers at the end of this article, after you learn how to make the tropical coconut planting pots.
HOW TO MAKE TROPICAL COCONUT PLANTING POTS AT HOME
Things You Need to Make Coconut Pots at Home
- Recycled coconut shells
- Hand or rotary saw
- Knife or sturdy spoon for scooping out the meat
Making Coconut Planting Pots Step by Step
1. Cut off the Top of the Coconut Shell
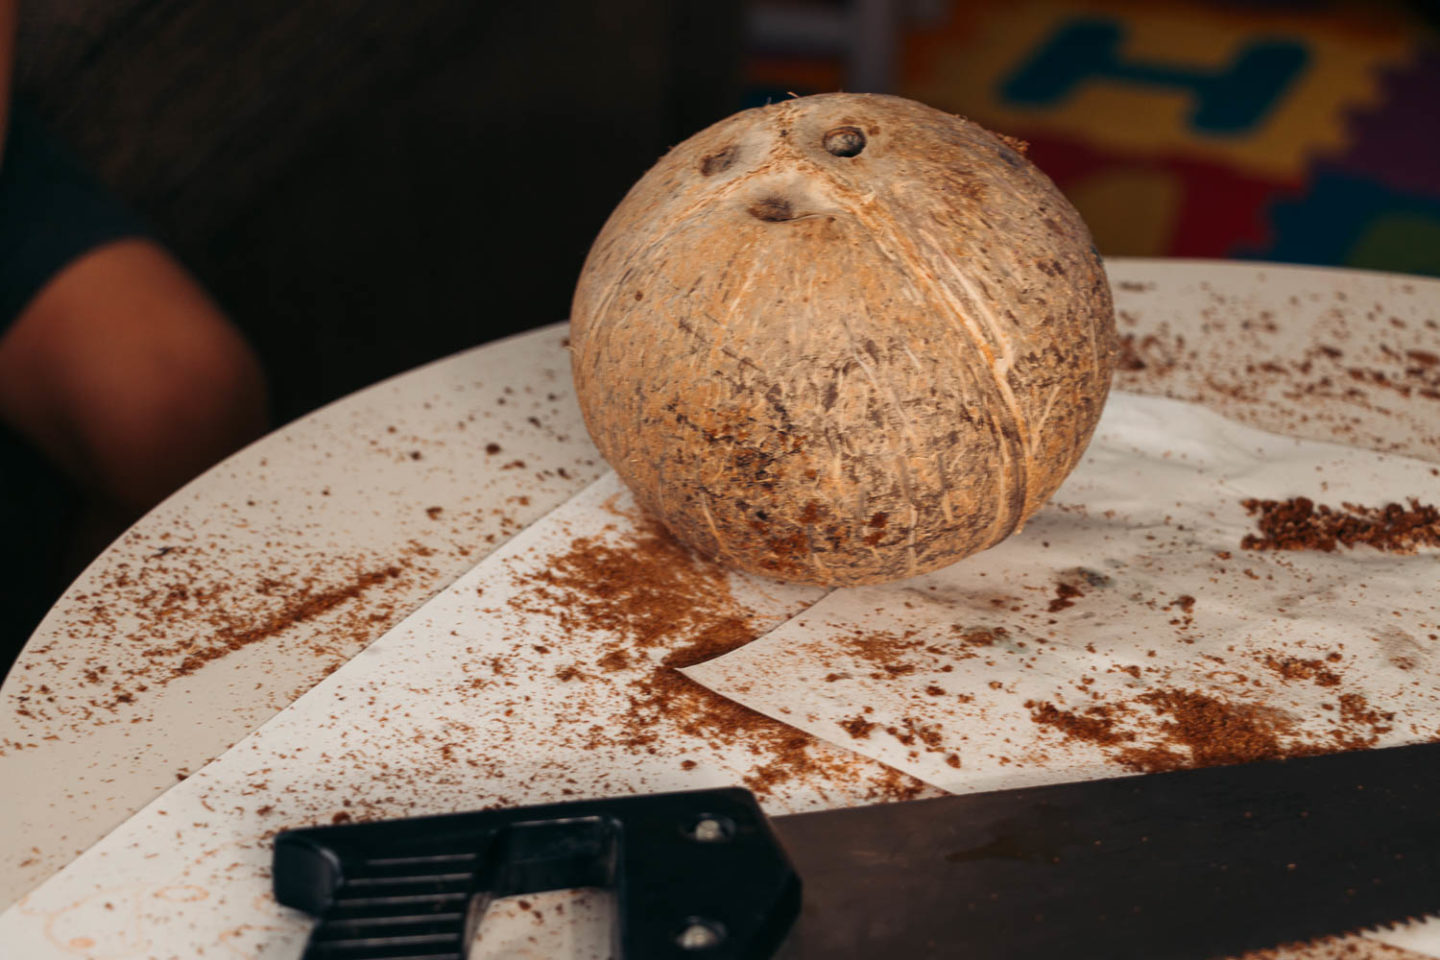
With a hand or rotary saw cut off the top portion of the coconut so it looks like a pot. If you use the hand saw, prepare for a challenge. The coconut shell is hard. Cutting it off requires some strength and persistence. You might even feel that this task is impossible. I know that feeling. But eventually the shell gives in and you end up with a beautiful, tropics-inspired coconut planting pot.
TIP: Saw the coconut shell in half for the pot with the wider opening. If you aim for a rounder shape with the narrower opening like the one you often use for homemade candles, chop off the tip or approximately 2/3 of the coconut shell. The bigger the opening the easier to plant the flowers.
You can also drill a small hole at the bottom of your coconut planting pot to create a drainage hole. If you plan to hang the coconut pots in the macrame plant hanger like I did, the hole is not necessary. Make sure, though, to not overwater your plant so the roots don’t rot.

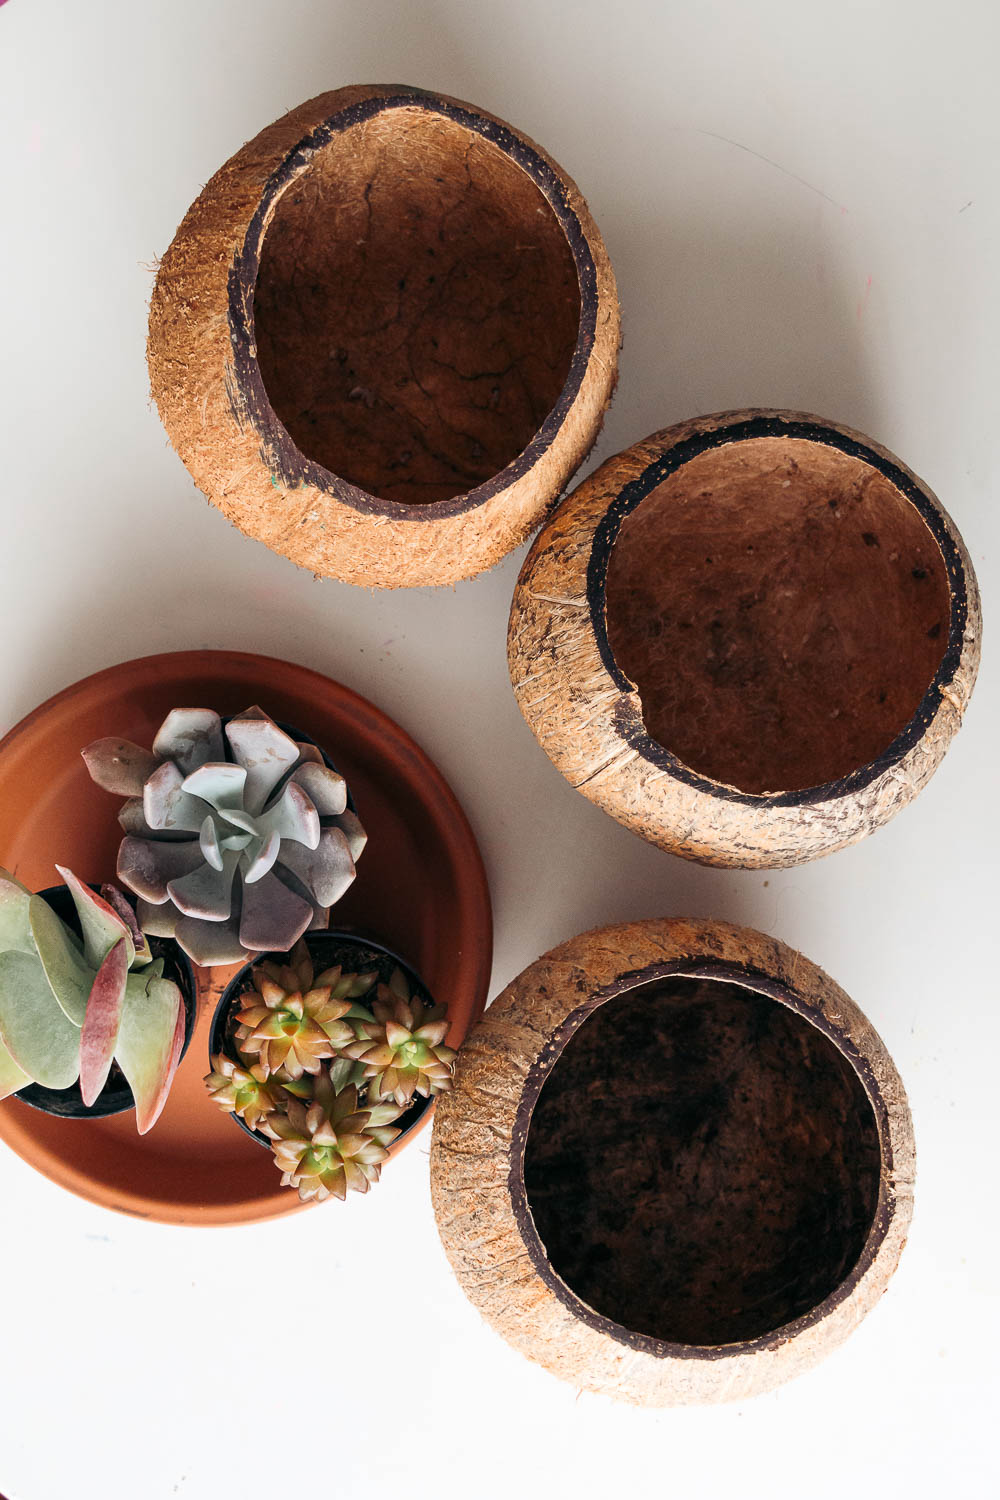
2. Scoop out Coconut Meat
Use a knife or any sturdy spoon to scoop out the coconut meat from your shell-pot. This step is by far the hardest one. But little by little, the hard flesh detaches from the coconut shell.
TIP: One of the tricks to remove the meat is to keep the coconut shell in boiling water for about 5 minutes. Remove the shell from the water and let it cool down. Once the coconut is cold enough to hold it, carefully peel the knife through the edge to loosen the sides of the coconut. The meat is going to pop out in no time.
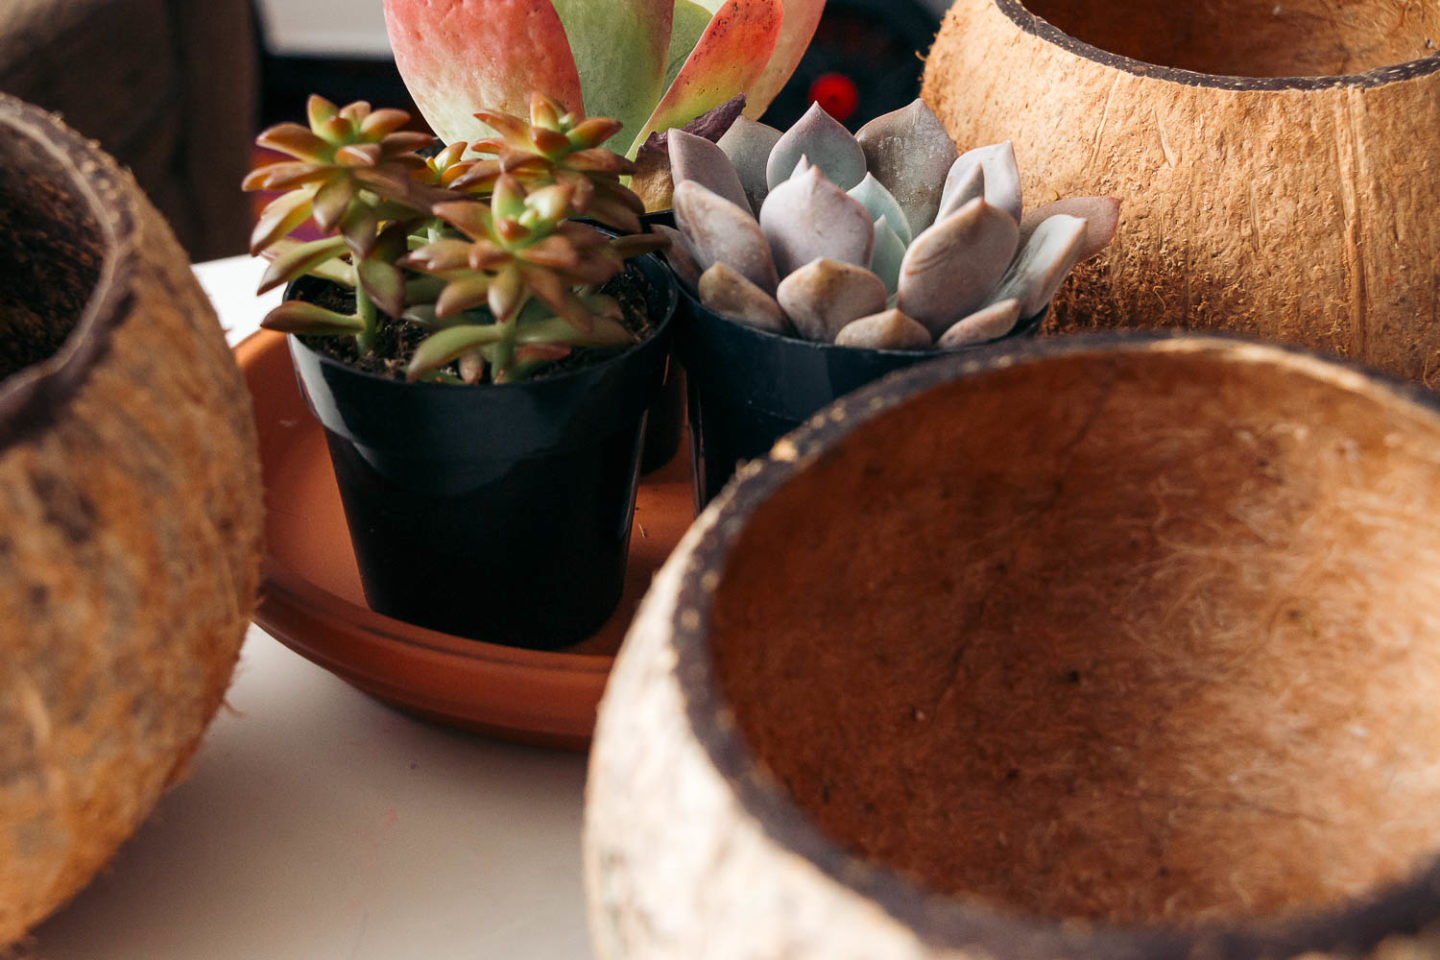
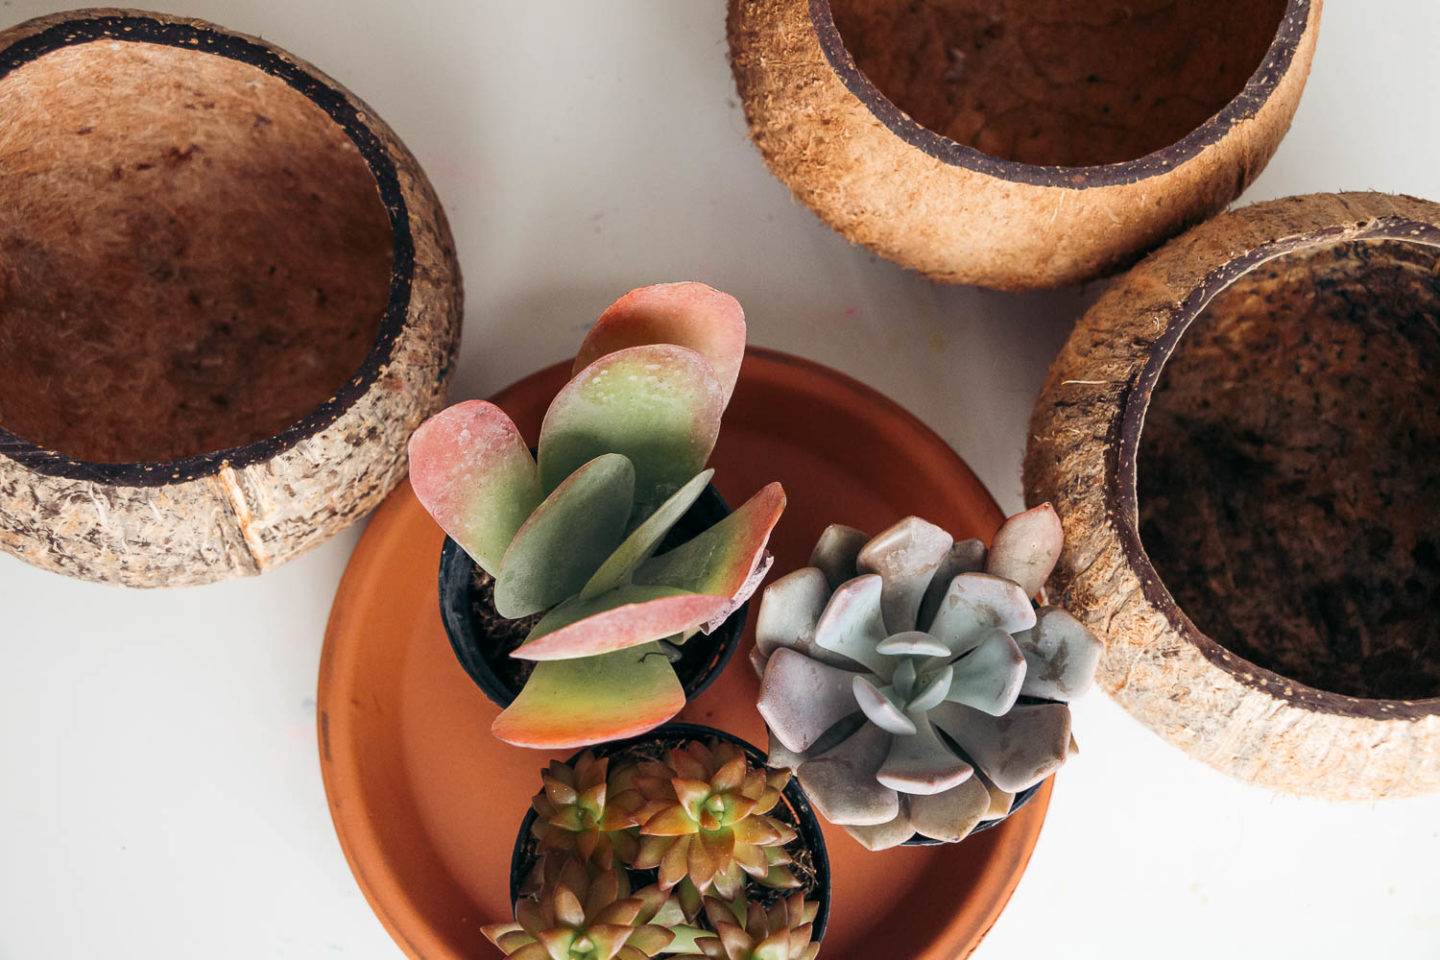
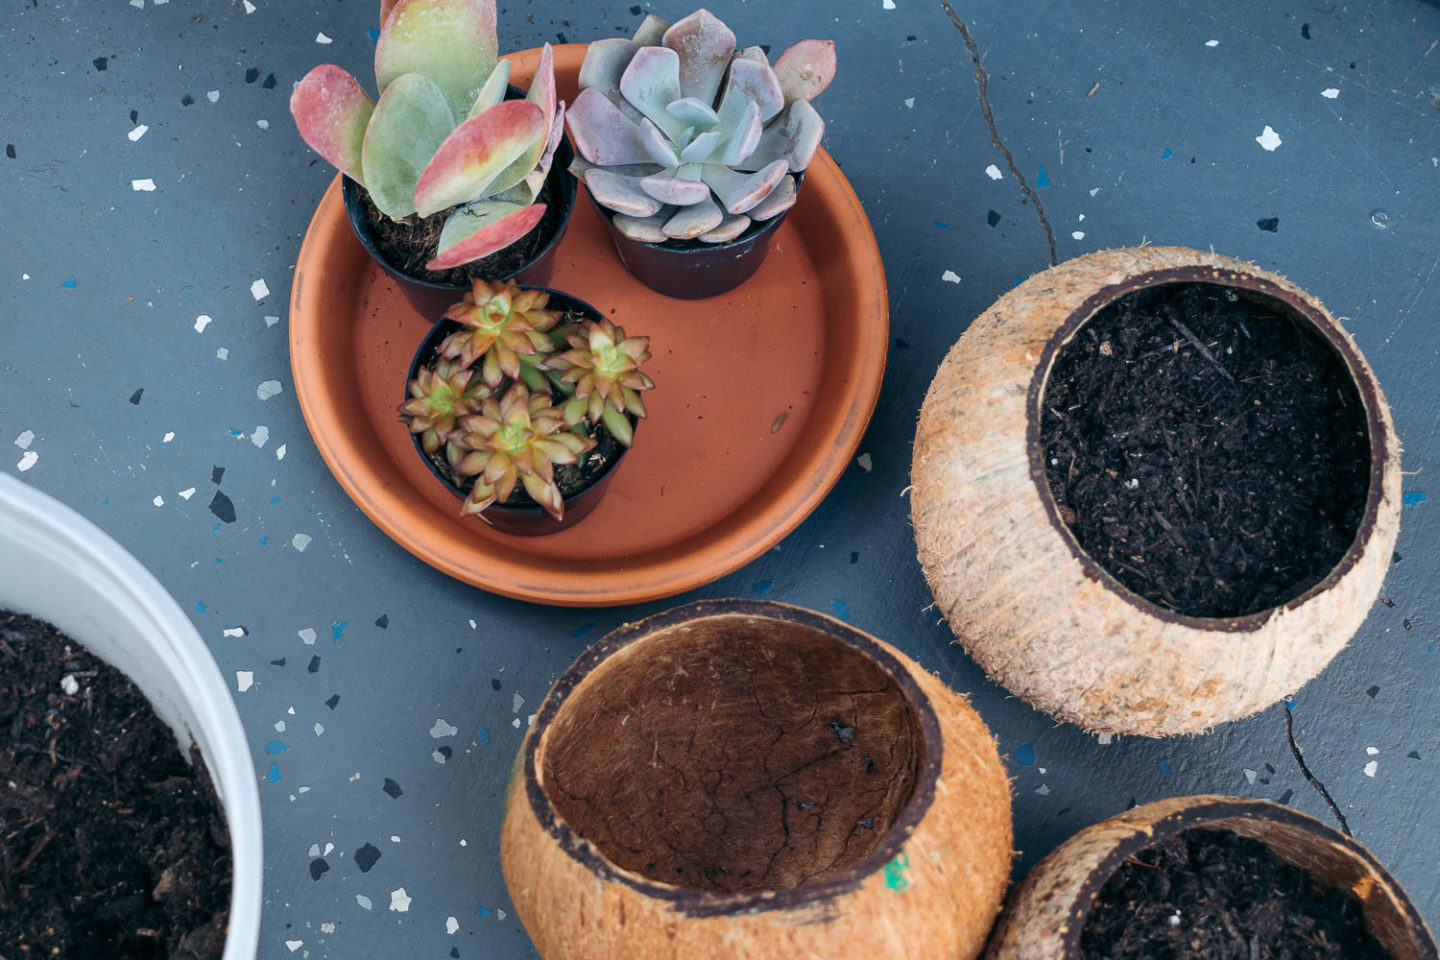
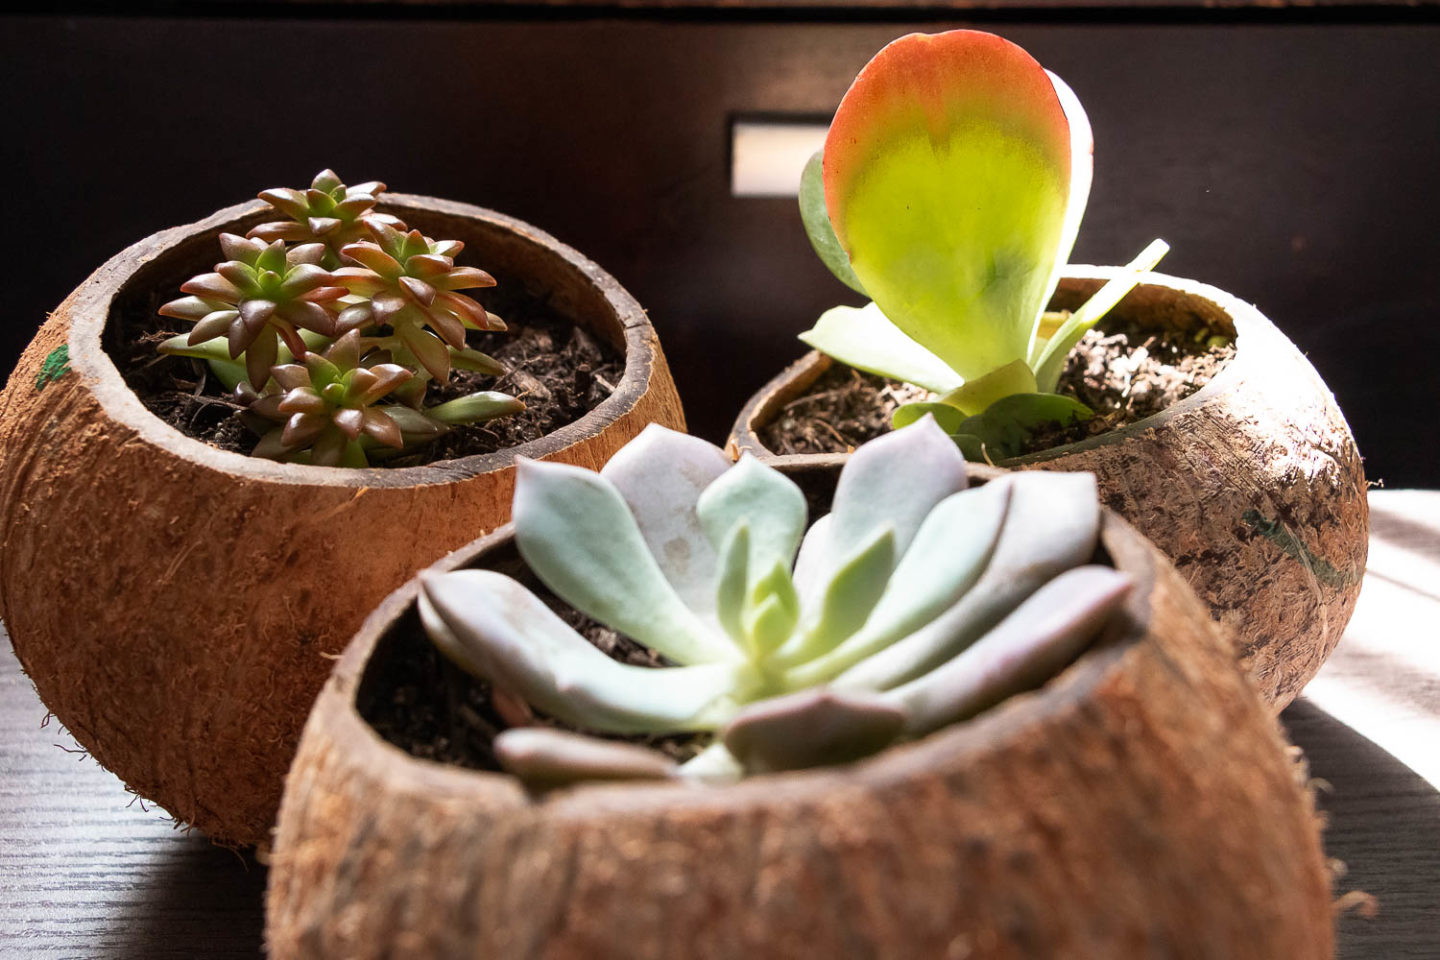
3. Plant a Plant
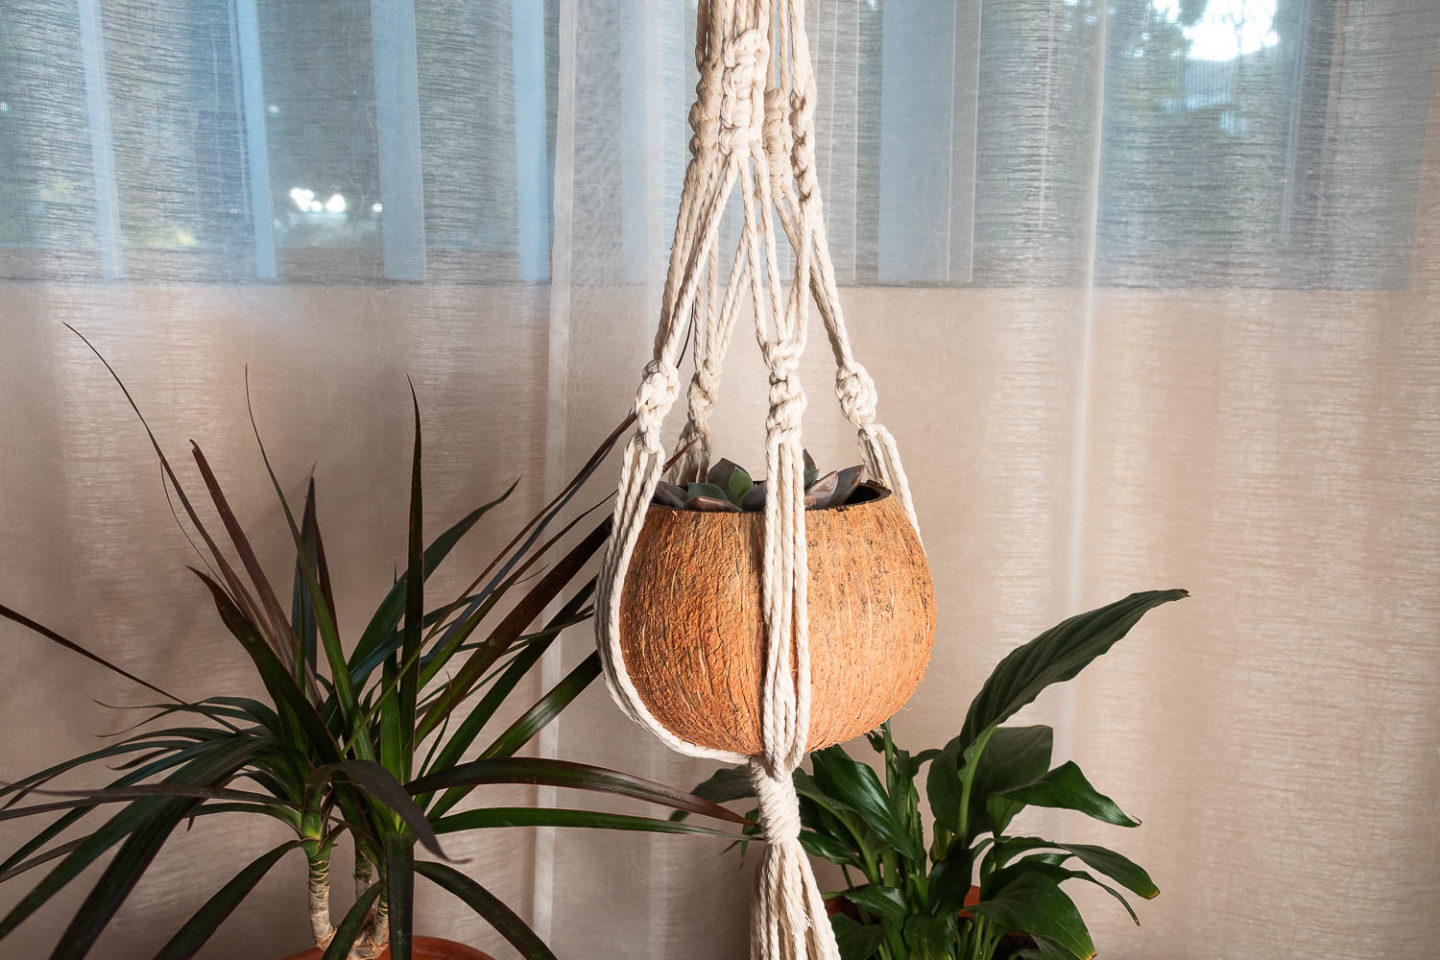
Fill your coconut pot with soil and plant a flower now. Alternatively, you can make the macrame plant hanger first as you will need to use the pot to measure the length of the hanger. This ensures that your plants don’t get hurt when you put the coconut pot in and out of the macrame hanger.
I planted the flowers first, as I couldn’t wait to see the almost finished result, and then went on to make the macrame plant hanger. No plants were hurt while making the latter.
HOW TO MAKE MACRAME PLANT HANGER FOR YOUR COCONUT POT AT HOME
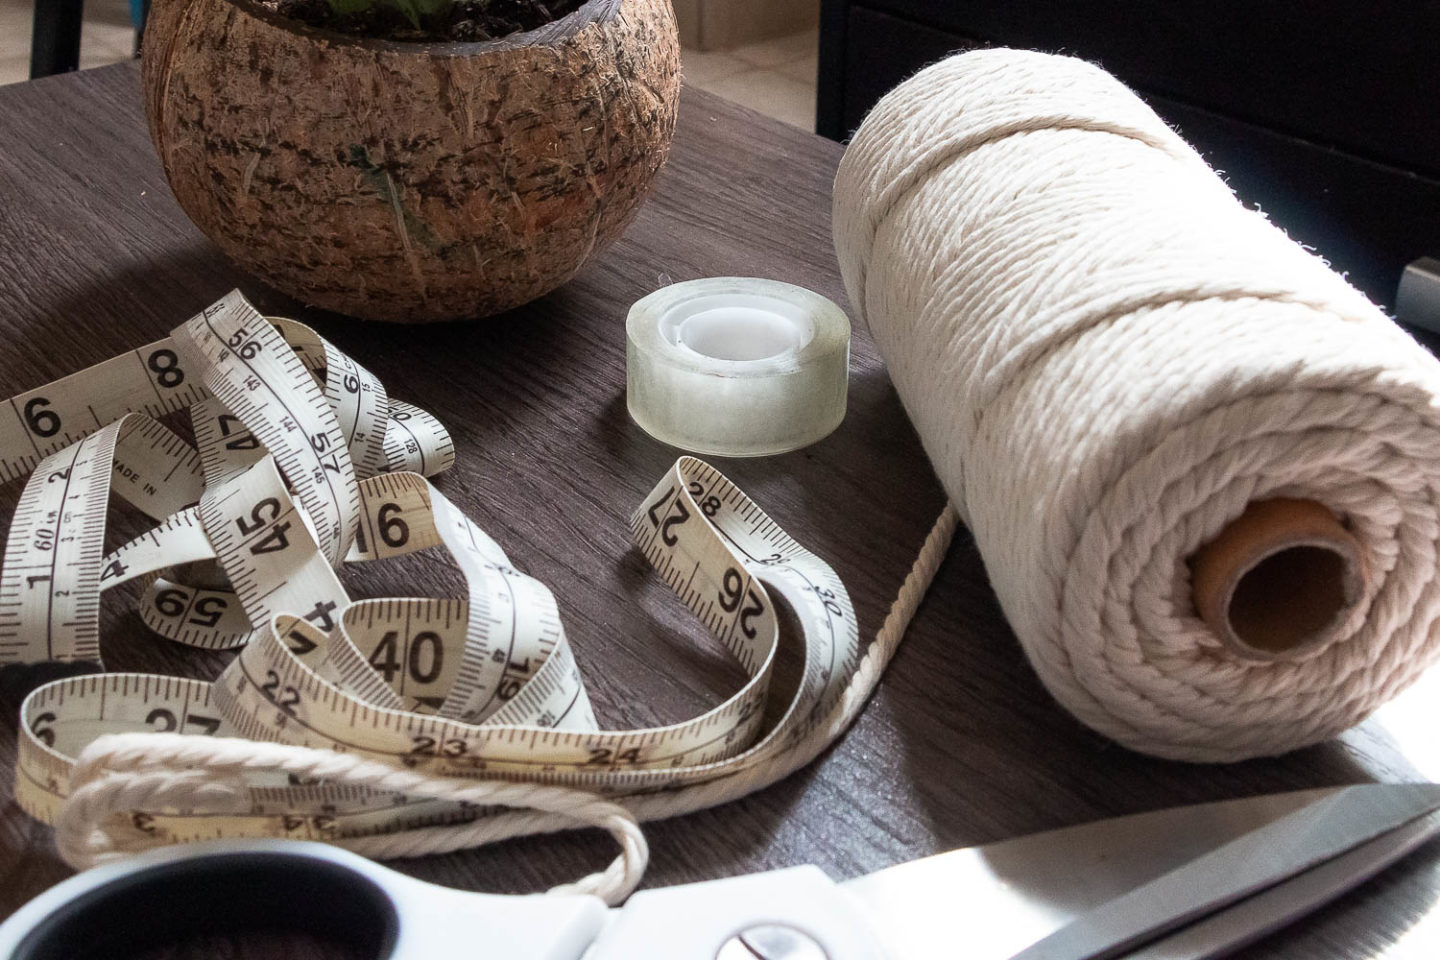
Things You Need to Make Macrame Plant Hanger
- Thick macrame cord, 3mm
- Scissors
- Masking tape
- Measuring tape
- Wooden ring (optional)
DIY Macrame Plant Hanger for your Coconut Pot: Step by Step
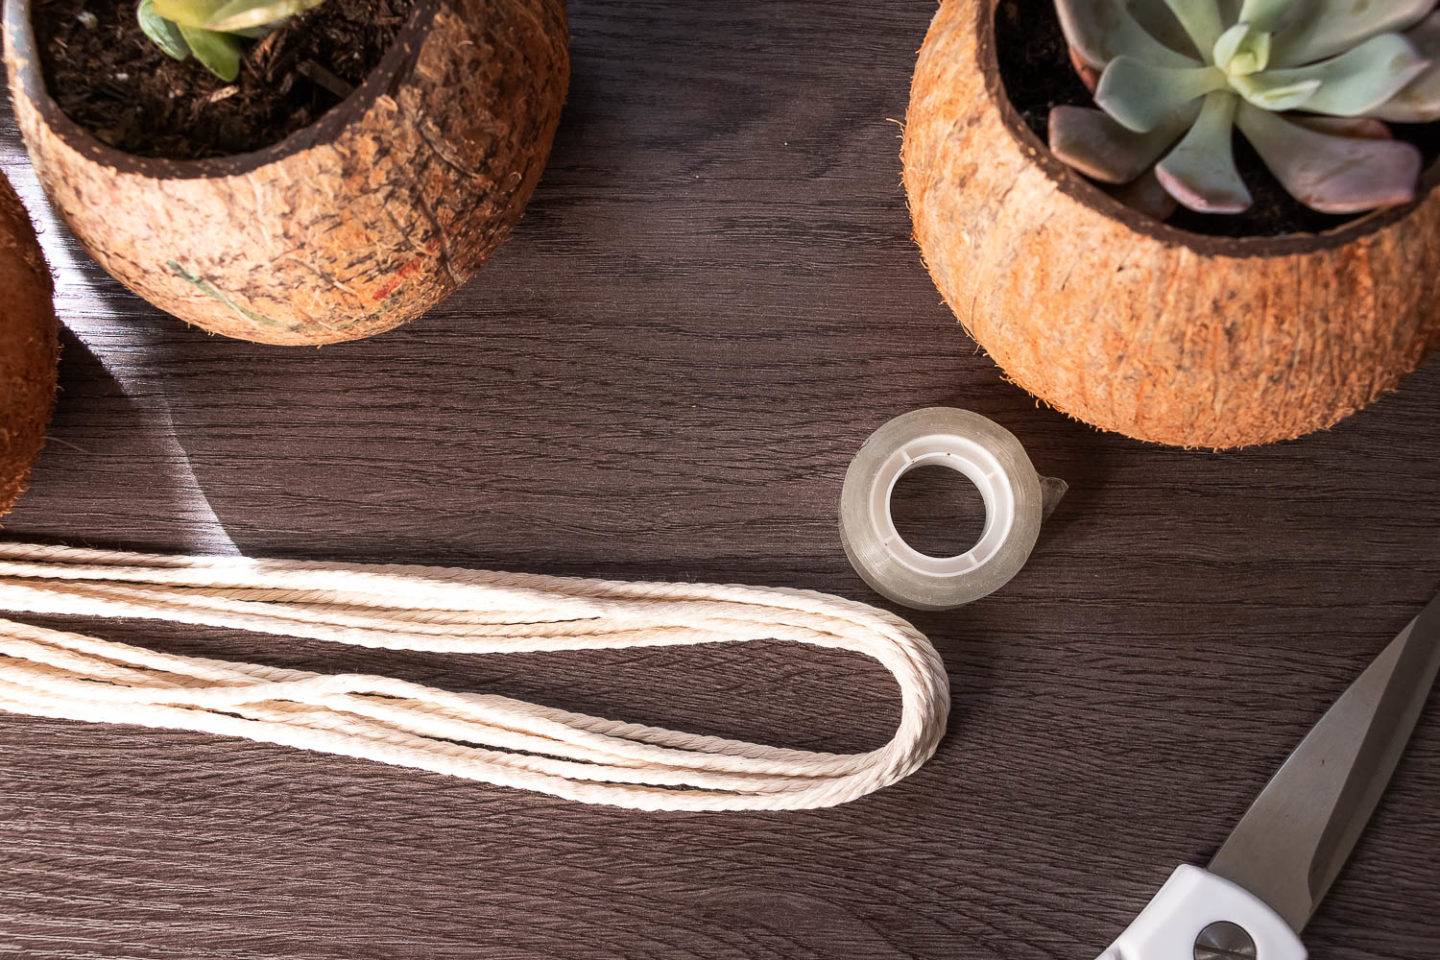
1. Prepare the Cords
For a four-legged macrame plant hanger, take 8 cords of 2 meters (78 inches) each and 2 cords of 1 meter (39 inches) each.
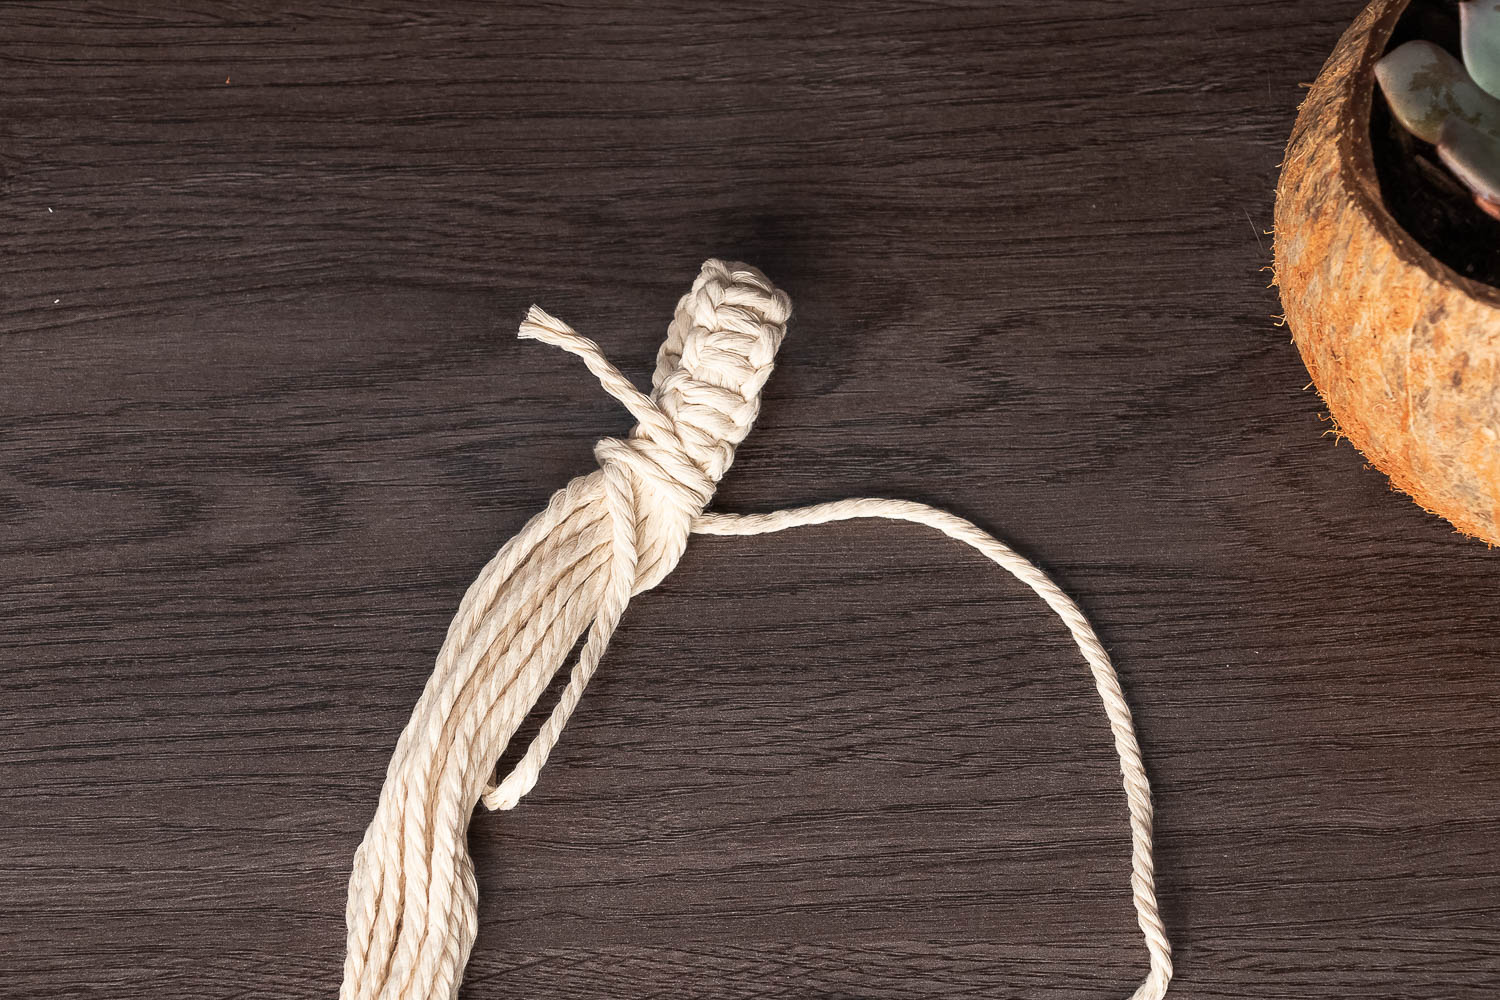
2. Make a Ring (you can skip this step if you have a wooden ring)
If you use the wooden ring, pass the 8 long cords through it so that the ring is exactly in the middle and you have 16 cords of equal length.
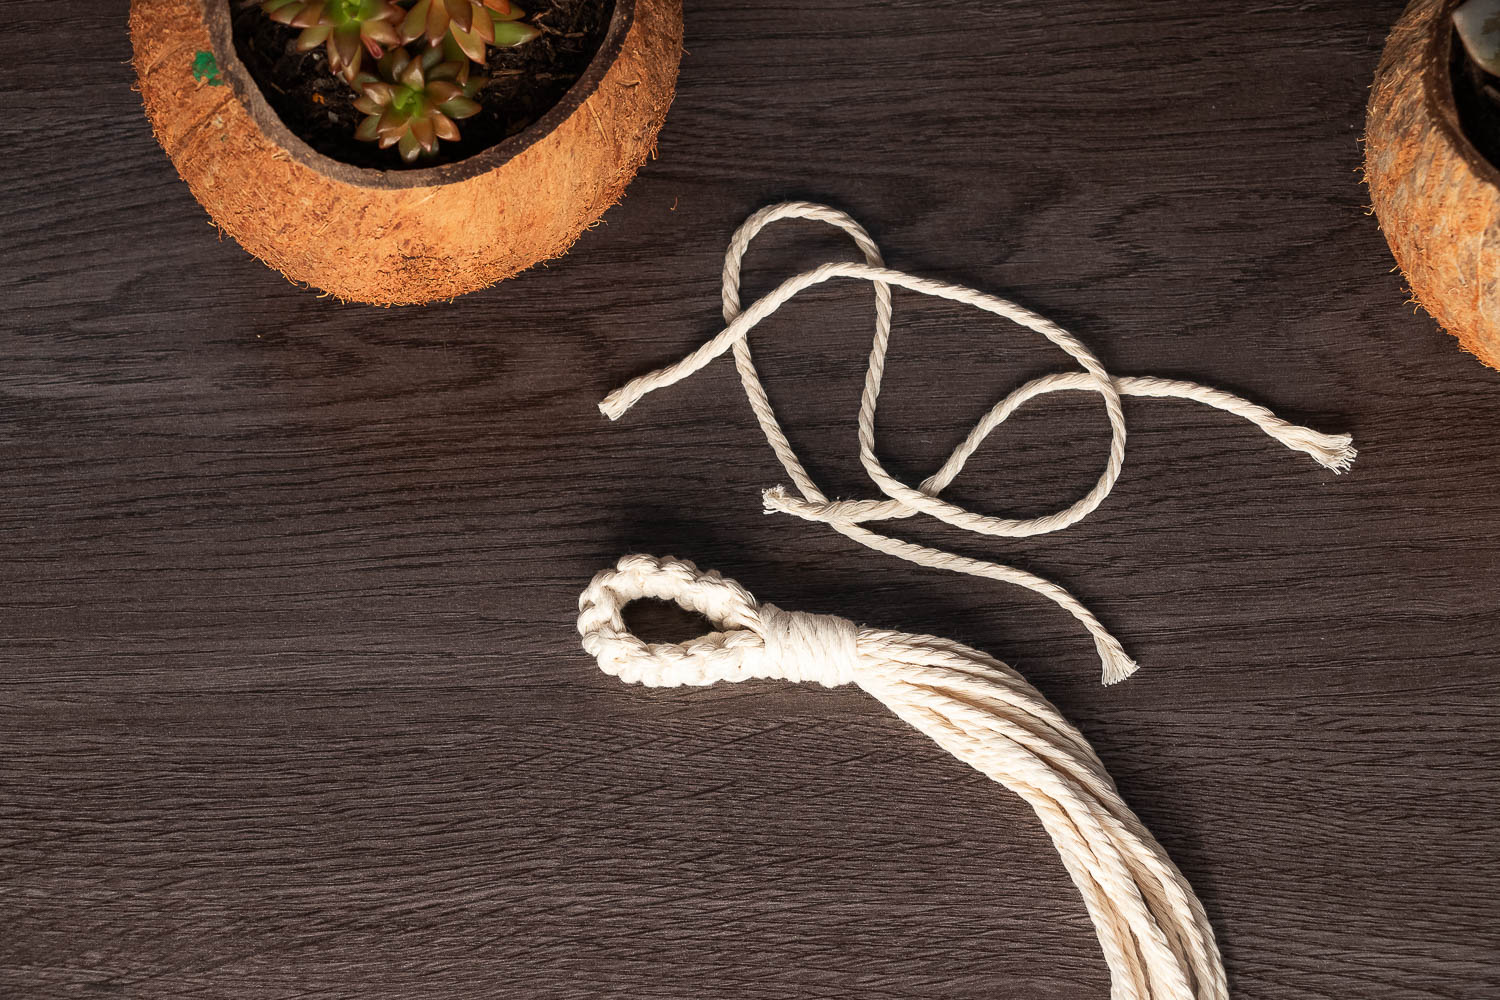
Lark’s Head Knot
If you don’t have the ring, set the 8 cords together and fold them in half to find the center. Make a Lark’s head knot with the 1-meter cord, by passing the folded in half shorter cord underneath and bringing it back over the folded longer strings. Bring the ends through the loop you just created and pull them tight.
Extend the 8 longer strings together with the extra 2 from the shorter cords. Tape them down to one extreme. Now start working with the 8 longer cords closest to you.
Square Knot
Separate one cord on each side and make 5 square knots. To do this, bring the left cord over the middle cords and under the right cord. Then bring the right cord under the middle cords and through the loop formed by the left cord. Pull and you have the first half of the square knot.
Now do the opposite. Bring the right cord over the middle cords and under the left cord. Pull the left cord under the middle cords and through the loop created by the right cord. Repeat the same knot 4 more times.
Now untie the extra cord in the middle, turn the cords around and make another 5 square knots.
Gathering Knot
Fold the knotted string (“ring”) in half and align the ends of the square knots. Make a gathering knot using the 1-meter cord. Leave a short tail at the top and make a loop. Using the longer end, wrap it around the other cords from top down. Wrap it about 10 times or as many times as you need. Then pull the long tail through the loop. Pull on the short tail to tighten the knot. Trim both tails.
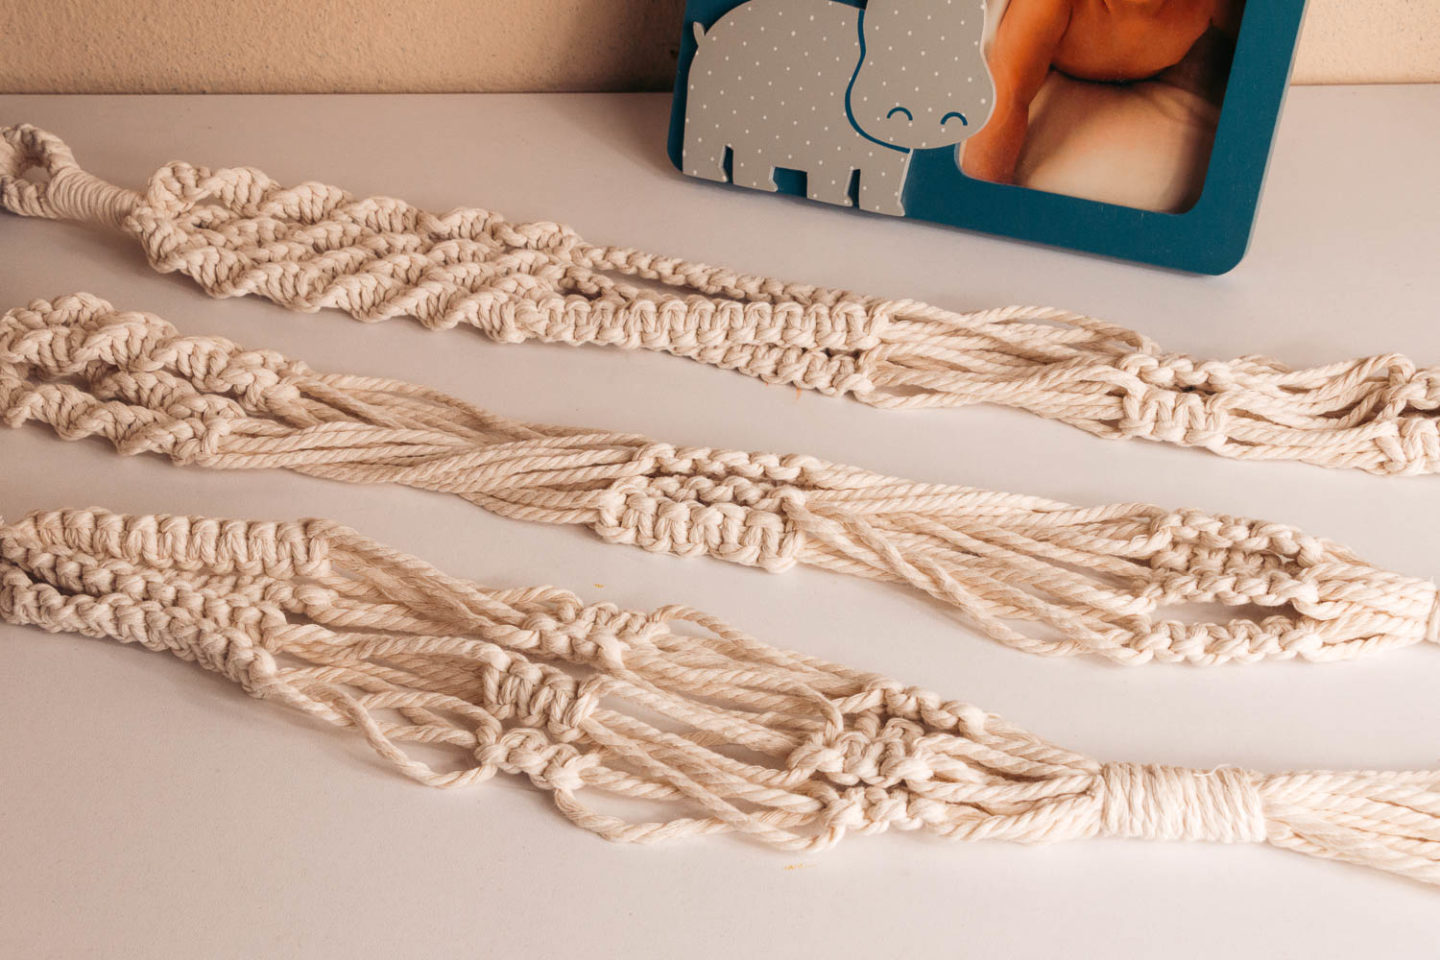
3. Decorate the 4 “Legs”
Place the ring somewhere where it’s easy to hang it and work with. Separate the 16 strings you now have into 4 groups (4 strings in each). For each group make 10 spiral stitch knots.
Spiral Stitch Knot
Hold the middle part straight, bring the left cord over the middle cords and under the right cord. Put the right cord under the middle cords and through the loop created. Start again from the left side and repeat the same knot 9 more times.
Do the same for the remaining 3 “legs”-groups.
With the measuring tape measure 8 centimeters (3 inches) and make 3 square knots. Repeat the same for each group.
Then leave about 5 centimeters of space and make 6 spiral stitch knots using 2 left cords from one group and 2 right cords from the group next to it. Repeat the same for the other groups.
Leave about 10 centimeters (4 inches) of space. Depending on the size of your tropical coconut pot, you may need to leave 15 centimeters (about 6 inches) of space. Make a gathering knot with the second 1-meter cord.
6. Decor the Bottom of Your Macrame Plant Hanger
Leave about 10-15 centimeters of space and cut off the cords.
TIP: As the coconut pots are normally small and light, you can use a 3-legged macrame plant hanger. In this case, you’ll need only 6 long strings.
The macrame plant hanger just like the coconut pot itself allows for improvisation. You can come up with your own design, knot the entire leg or make several knots with long empty spaces between them. Once you master the square and spiral stitch macrame knots, the rest is a pure art of creativity.
7. Find a Home for Your Macrame Plant Hanger
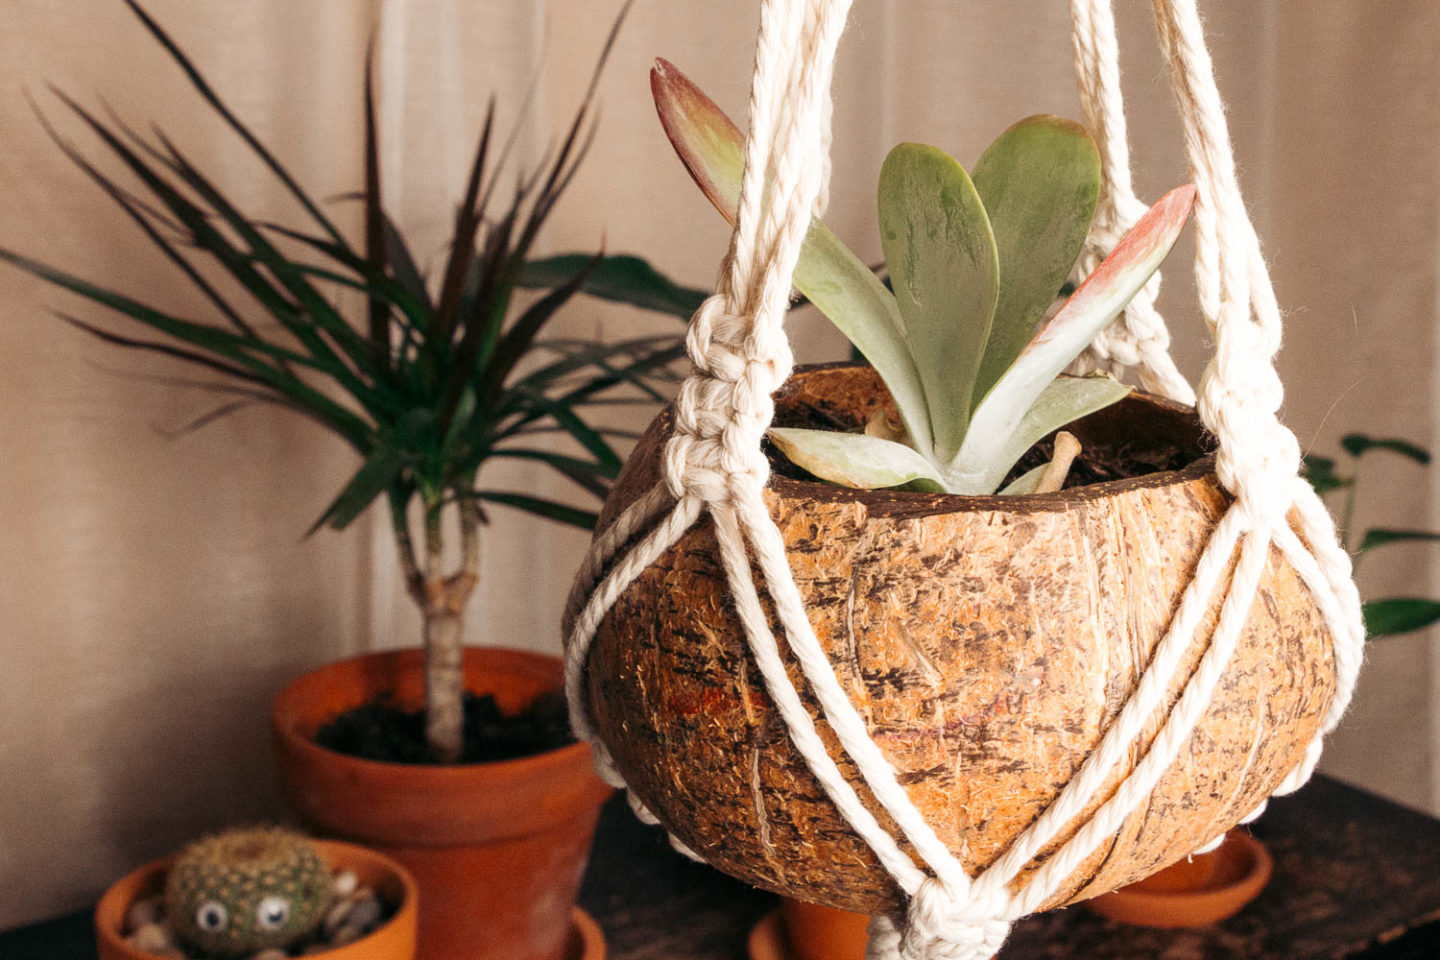
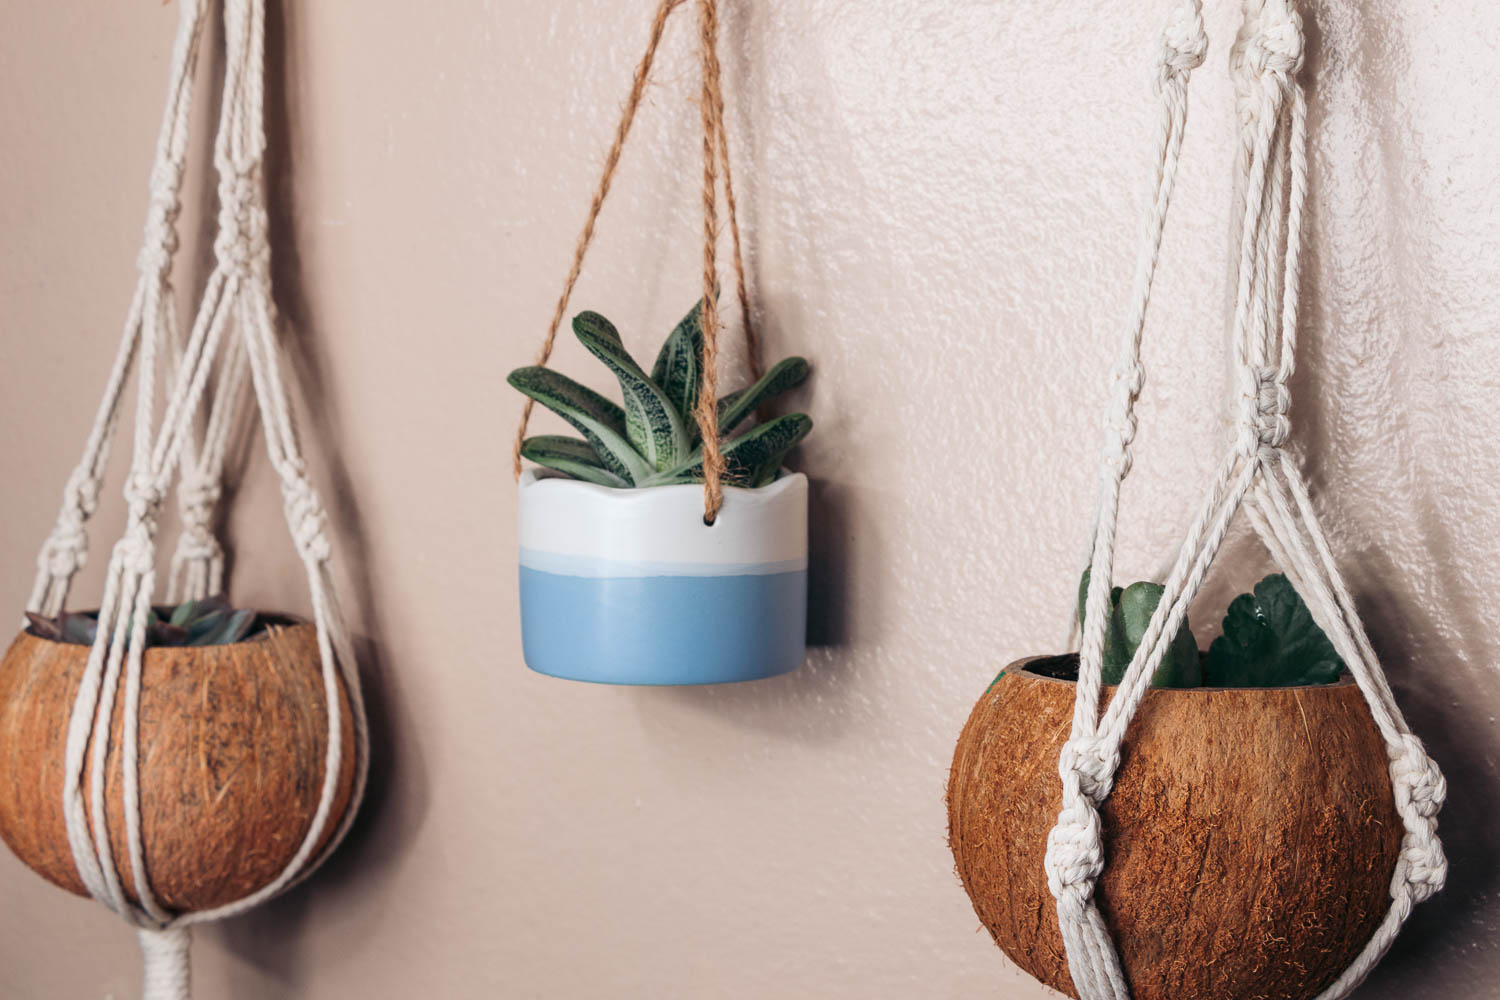
Put your coconut pot with the soil and flower planted in it inside the macrame hanger and hang it on the wall or the ceiling. Now you can relive your tropical adventures every time your eyes fix on this little DIY creation of yours.

Get More Inspiration for Your Home
- HOME LIBRARY: 9 Tips for Organizing Your Home Library
- TRAVEL: 10 Ways to Keep Your Travel Memories Fresh
